Documentation
user guide
User Guide
This guide walks through every feature of BDD Health Quest, explains how each part of the game works, and gives you enough context to understand both the gameplay and the testing approach behind it.
Getting Started
Install dependencies and start the development server:
npm install
npm run dev
Open http://localhost:5173 in your browser. You'll see the main game screen:
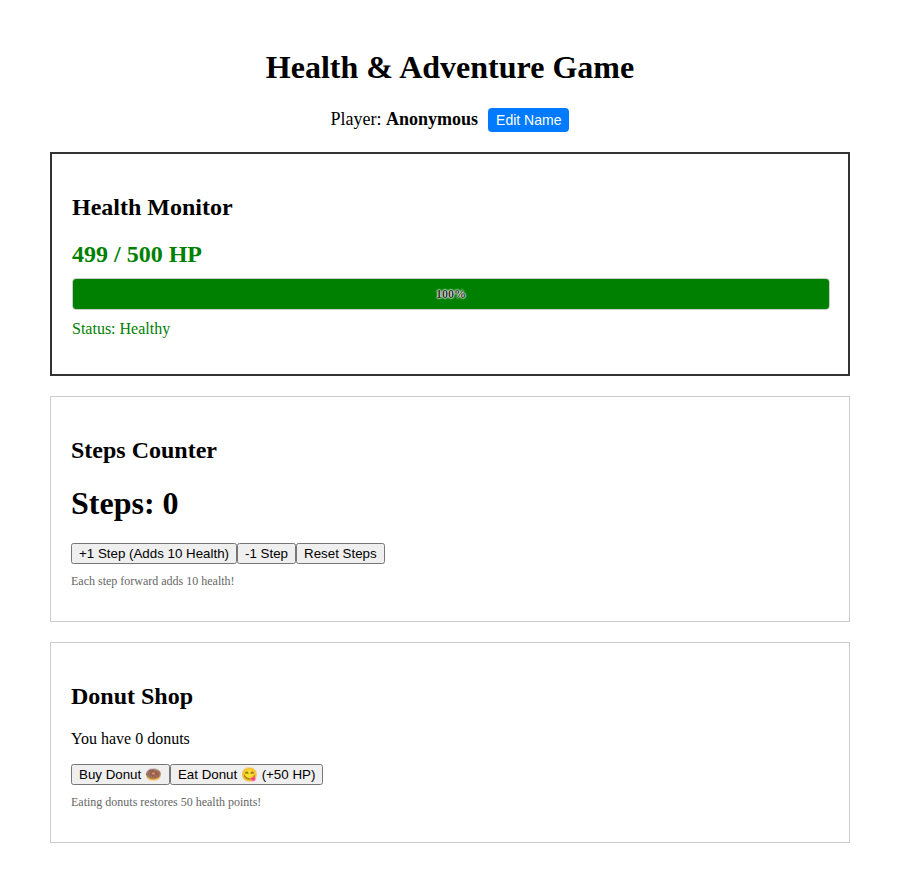
The game starts you with 500 HP, 0 steps, and 0 donuts as the player Anonymous. From the moment the page loads, your health begins ticking down by 1 HP every second. The game is a race against time -- you need to take steps and eat donuts to keep your health above zero.
Here's how the game panels are laid out:
Player: Anonymous [Edit Name]"] HM["Health Monitor
499 / 500 HP
████████████████ 100%
Status: Healthy"] SC["Steps Counter
Steps: 0
[+1 Step] [-1 Step] [Reset]"] DS["Donut Shop
You have 0 donuts
[Buy Donut] [Eat Donut (+50 HP)]"] end Header --- HM --- SC --- DS style Header fill:#e0f2fe,stroke:#0284c7 style HM fill:#dcfce7,stroke:#16a34a style SC fill:#f3e8ff,stroke:#7c3aed style DS fill:#fef3c7,stroke:#d97706
Health Monitor
The health monitor sits at the top of the game. It's the most important panel because it shows whether you're alive or dead.
What You See
- Current HP / Max HP -- e.g. "495 / 500 HP"
- A percentage bar -- visually shows how full your health is relative to your maximum
- A status label -- changes colour and text as your health drops
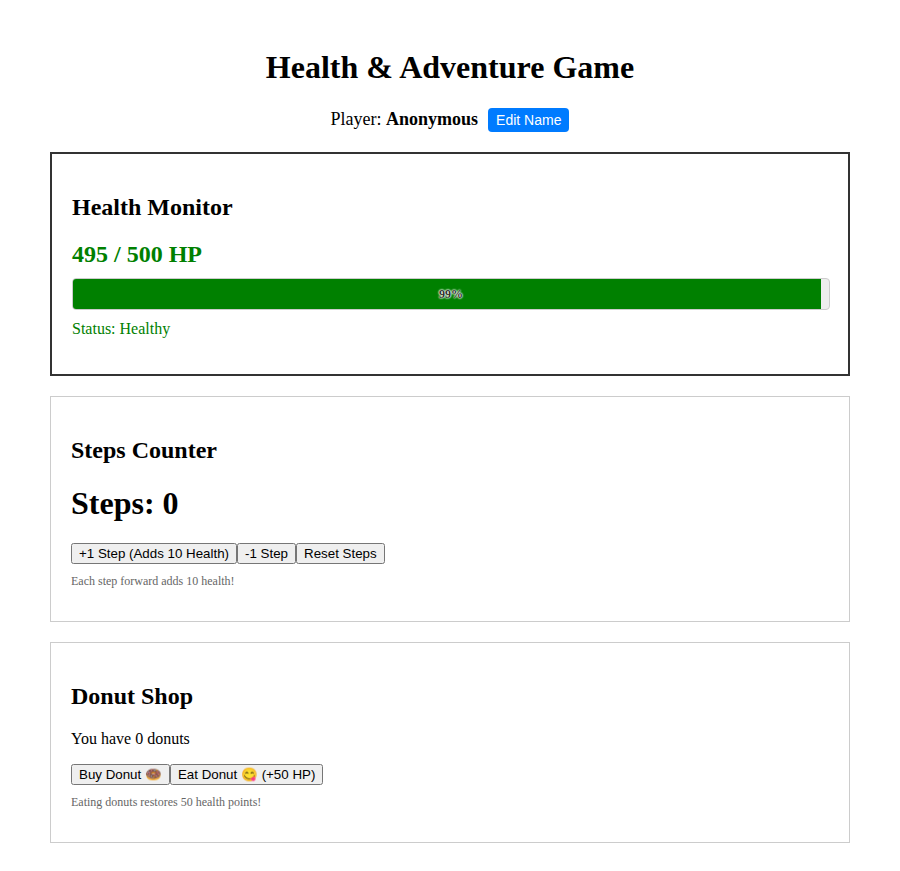
In the screenshot above, a few seconds have passed since the game started. Health has dropped from 500 to 495 because of the constant 1-HP-per-second decay. The bar shows 99% and the status reads "Healthy" in green.
Status Levels
As your health drops, the status and colour change to warn you:
(start)"] --> H300["300 HP"] H300 --> H150["150 HP"] H150 --> H0["0 HP"] end H500 -.- G["🟢 Healthy"] H300 -.- O["🟠 Warning"] H150 -.- R["🔴 Critical"] H0 -.- D["💀 Dead"] style G fill:#dcfce7,stroke:#16a34a style O fill:#fef3c7,stroke:#d97706 style R fill:#fee2e2,stroke:#dc2626 style D fill:#fca5a5,stroke:#991b1b
| HP Range | Status | Bar Colour | What It Means |
|---|---|---|---|
| > 300 | Healthy | Green | You're fine, but don't get complacent |
| 151 - 300 | Warning | Orange | Health is getting low, eat a donut |
| 1 - 150 | Critical | Red | Danger zone, act fast |
| 0 | Dead | Red | Game over, health reached zero |
How Max Health Works
Your max health starts at 500. But here's the thing -- it can go higher. If you gain health that pushes you above your current maximum (say you eat a donut when you're at 490/500, jumping to 540), the max health increases to 540. The percentage bar always shows your current HP as a fraction of this max, so even with a lot of health, you still see an accurate picture of where you stand.
This means that the more active you are early on, the higher your ceiling gets, which makes it easier to see when you start losing ground later.
Game Over
If your health reaches exactly 0, a red "Game Over!" alert appears. At that point the decay stops (you can't go negative), but there's no way to recover -- the game is over.
Steps Counter
The steps counter tracks your movement and is the primary way to counteract health decay.
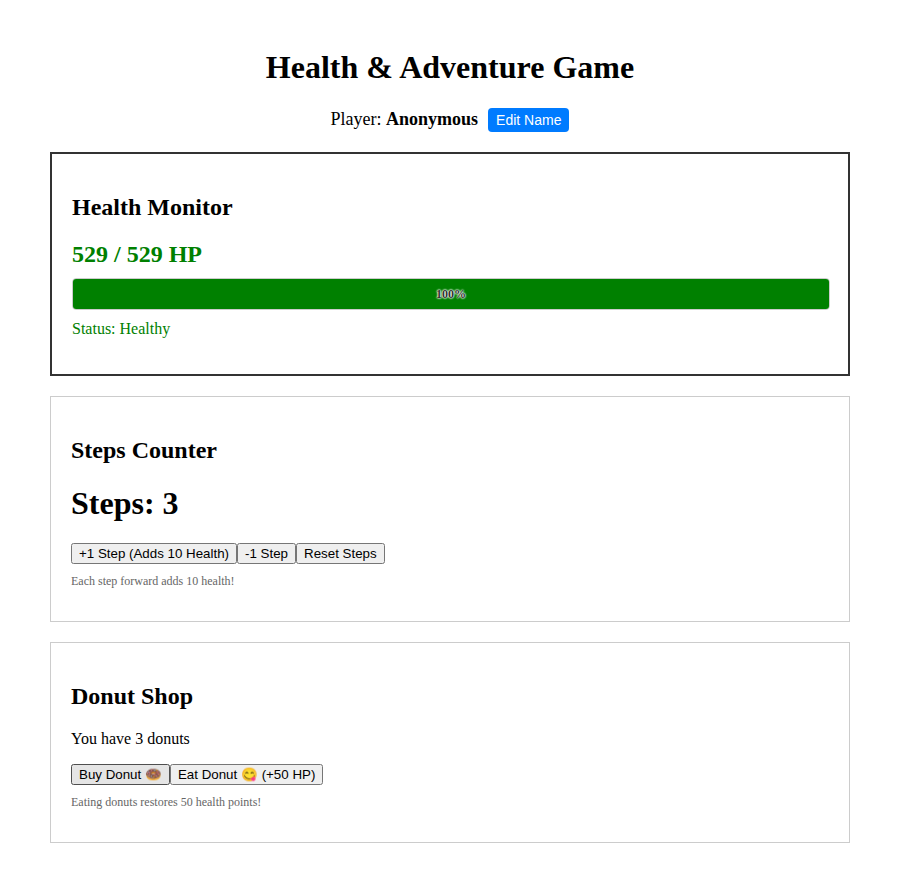
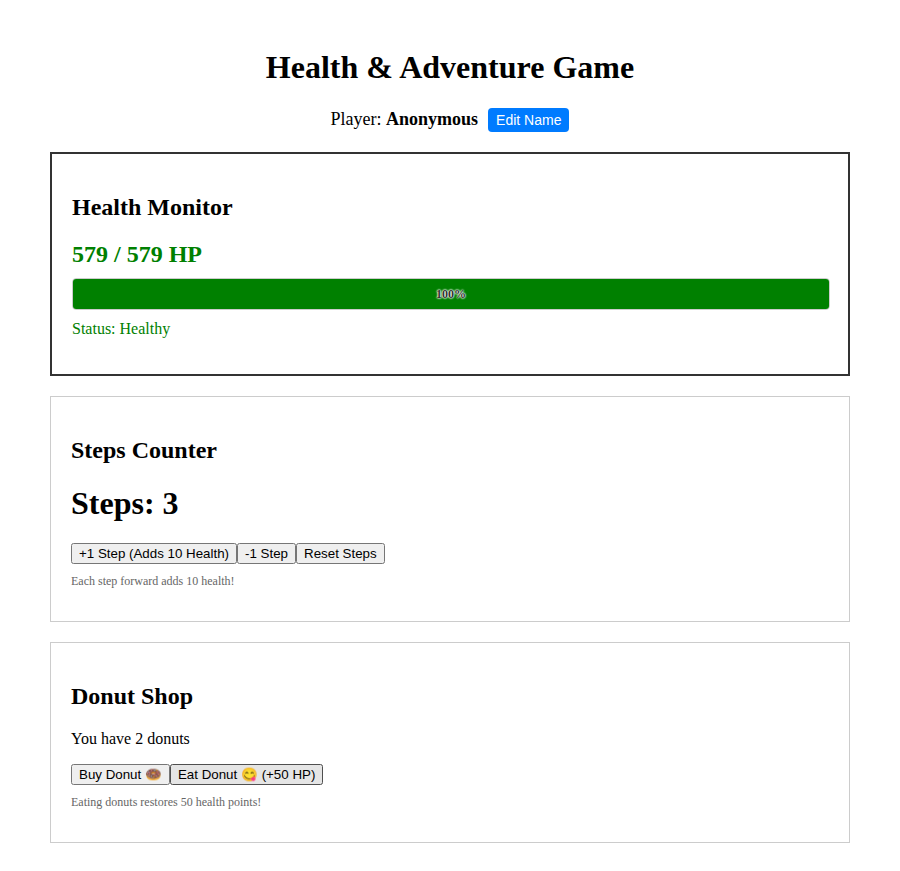
In this screenshot, the player has taken 3 steps, gaining 30 HP in the process. Health is at 529/529, meaning the extra health from steps pushed the max health above the starting 500.
Controls
There are three buttons:
+1 Step (Adds 10 Health) -- This is the main action. It increments your step count by 1 and immediately adds 10 HP to your health. Since health decays at 1 HP per second, a single step buys you 10 seconds of survival time.
-1 Step -- Decrements the step counter by 1. This does not remove any health -- it only changes the displayed step count. Think of it as correcting a miscount. You can go into negative steps if you want.
Reset Steps -- Sets the step counter back to 0. Again, this doesn't affect your health. It's purely a counter reset.
Strategy
The maths is straightforward: health drains at 1 HP/second, and each step gives 10 HP. So if you click +1 Step once every 10 seconds, you'll break even. Click faster and your health goes up. Click slower and you're on a slow decline.
Steps alone can keep you alive indefinitely if you're clicking fast enough, but they won't help you recover from a big deficit. That's where donuts come in.
Donut Shop
The donut shop is your emergency health kit. Donuts are items you buy and store, then eat when you need a big health boost.
Buying Donuts
Click Buy Donut to add a donut to your inventory. Each purchase adds 1 donut, and you can carry a maximum of 5 at a time. Buying a donut doesn't cost any health -- it just adds to your inventory.
If you try to buy a 6th donut, you'll see this error:
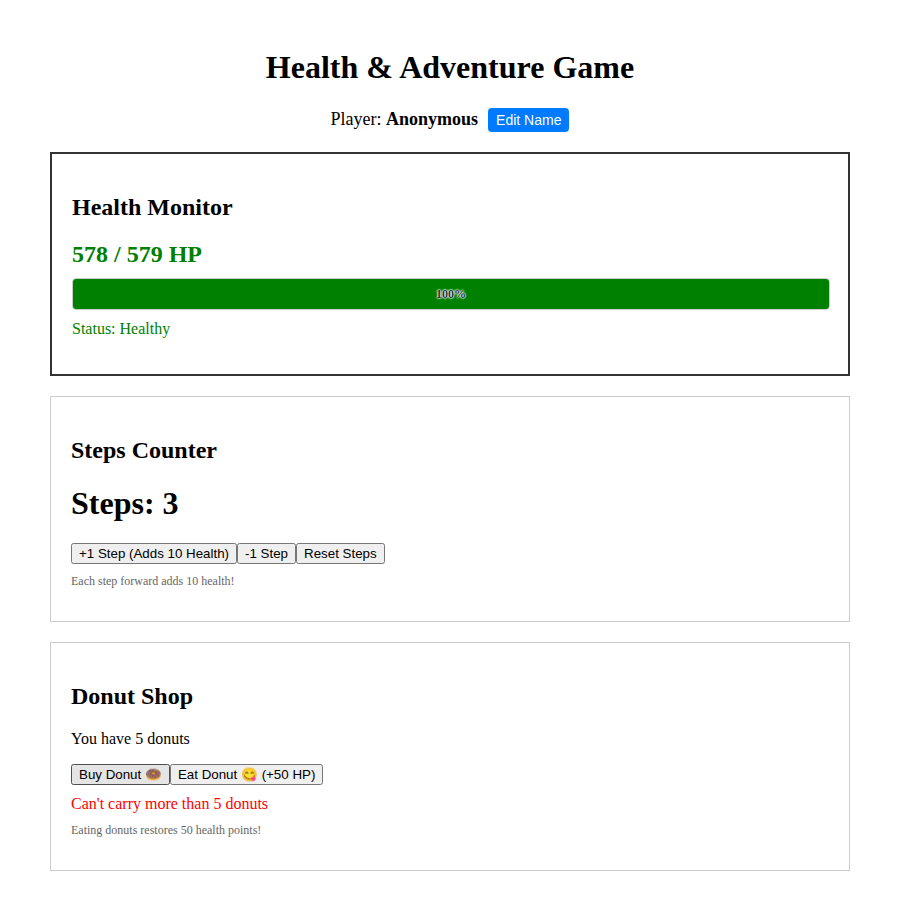
The error reads "Can't carry more than 5 donuts" and disappears after 3 seconds. Your inventory stays at 5.
Eating Donuts
Click Eat Donut (+50 HP) to consume one donut from your inventory and restore 50 health points. The donut is removed and your health goes up immediately.
If you try to eat when you have 0 donuts, you'll see "You don't have any donuts to eat" -- also clears after 3 seconds.
Strategy
Donuts are five times more powerful than a step (50 HP vs 10 HP), but they're a limited resource. The best approach is to stockpile donuts while your health is high and save them for when things get critical.
A full inventory of 5 donuts represents 250 HP of potential healing -- that's a massive recovery if you've let your health drop to the Warning or Critical zone. But once you've eaten them all, you need to buy more, and you can only buy them one at a time.
The rhythm of the game tends to be: step regularly to maintain health, buy donuts when you have a moment, and eat donuts in emergencies.
Player Name
Your player name defaults to Anonymous and appears at the top of the screen. You can change it by clicking the Edit Name button.
Opening the Editor
Clicking Edit Name opens a modal dialog that overlays the game:
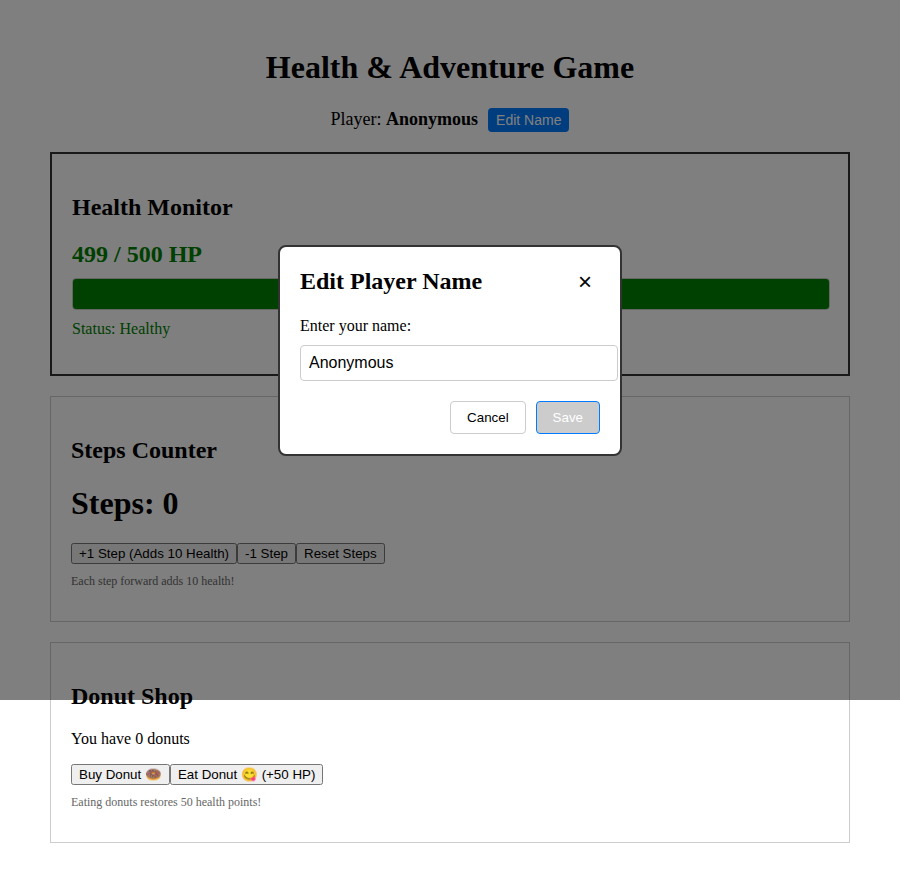
The modal shows your current name in an input field with Cancel and Save buttons. The game continues running behind the modal (health still decays), so don't spend too long here.
Validation Rules
Your name must be between 5 and 7 characters long. Validation happens live as you type -- you don't need to submit to see whether your name is valid.
Save disabled"] Check -->|"5-7 chars"| Valid["🟢 Valid name!
Save enabled"] Check -->|"> 7 chars"| Long["🔴 Too long
Save disabled"] Valid -->|"Click Save"| Saved["✅ Name updated
Modal closes"] style Short fill:#fee2e2,stroke:#dc2626 style Long fill:#fee2e2,stroke:#dc2626 style Valid fill:#dcfce7,stroke:#16a34a style Saved fill:#e0f2fe,stroke:#0284c7
Too short (fewer than 5 characters):
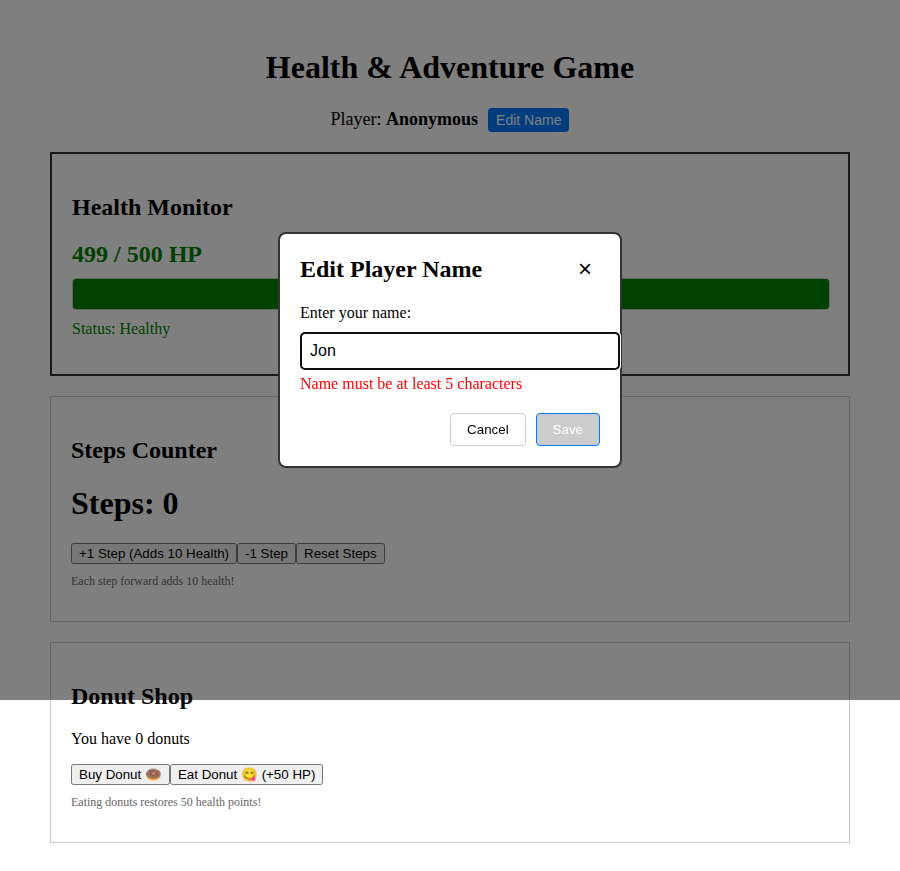
When you type a name like "Jon" (3 characters), you immediately see a red error: "Name must be at least 5 characters". The input field gets a red border and the Save button is greyed out and disabled.
Too long (more than 7 characters):
The same pattern applies -- you'll see "Name must be no more than 7 characters" and Save stays disabled.
Valid name (5-7 characters):
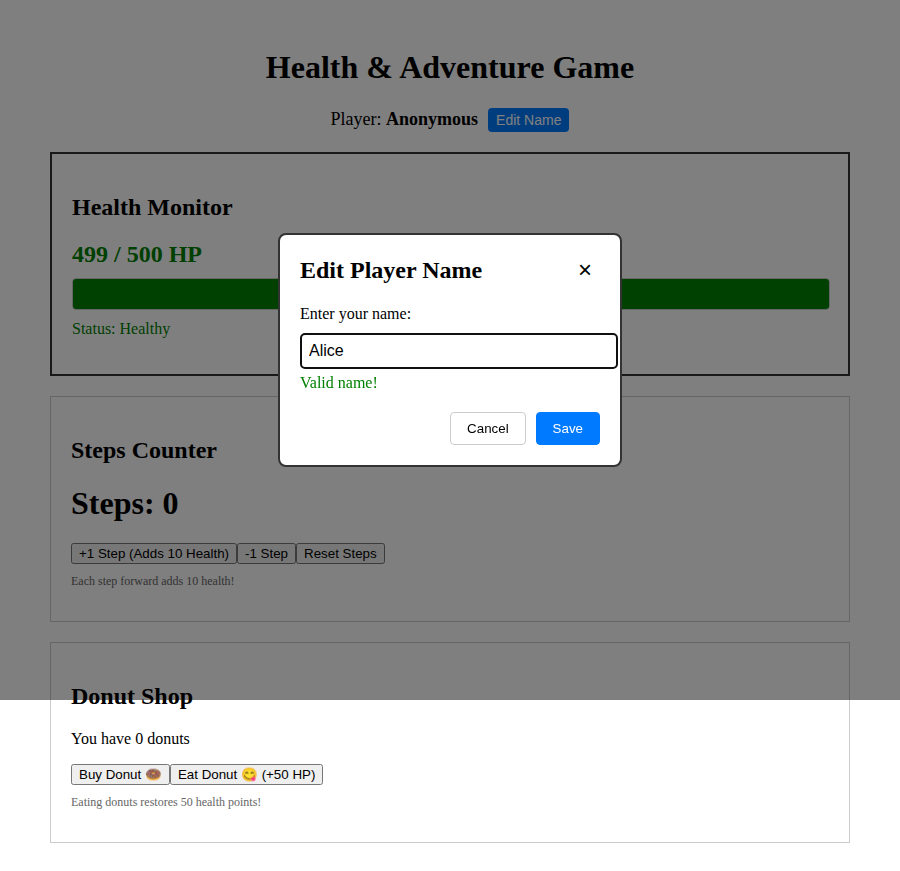
When the name is the right length, a green "Valid name!" message appears and the Save button turns blue and becomes clickable.
Saving Your Name
Click Save to apply the new name. The modal closes and the header updates:
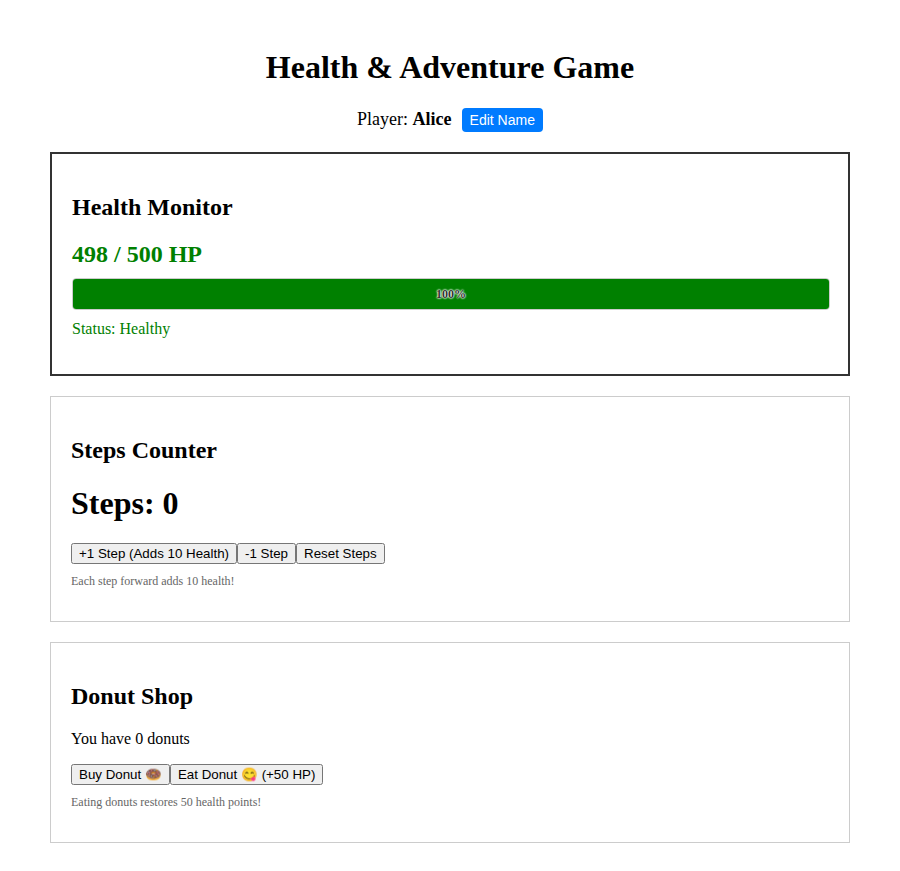
Here the player has changed their name to "Alice", and it now shows "Player: Alice" in the header.
Click Cancel or the X button to close the modal without saving. Your name stays whatever it was before.
Game Mechanics at a Glance
The following diagram shows how all the game actions interact with the health system:
-1 HP/sec"] -->|drains| HP["❤️ Health"] Step["🚶 Take Step
+10 HP"] -->|heals| HP Eat["🍩 Eat Donut
+50 HP"] -->|heals| HP HP -->|"> 300"| Healthy["🟢 Healthy"] HP -->|"151-300"| Warning["🟠 Warning"] HP -->|"1-150"| Critical["🔴 Critical"] HP -->|"= 0"| Dead["💀 Game Over"] Buy["🛒 Buy Donut"] -->|"+1"| Inv["📦 Inventory
(max 5)"] Inv -->|"-1"| Eat Step -->|"+1"| Steps["👣 Step Count"] style HP fill:#fee2e2,stroke:#dc2626 style Healthy fill:#dcfce7,stroke:#16a34a style Warning fill:#fef3c7,stroke:#d97706 style Critical fill:#fee2e2,stroke:#dc2626 style Dead fill:#fca5a5,stroke:#991b1b style Inv fill:#f3e8ff,stroke:#7c3aed
| Action | Health Effect | Other Effect |
|---|---|---|
| Time passing | -1 HP/sec | Constant, automatic drain |
| Take a step | +10 HP | Increments step count |
| Eat a donut | +50 HP | Removes 1 donut from inventory |
| Buy a donut | None | Adds 1 donut (max 5) |
| Remove a step | None | Decrements step count only |
| Reset steps | None | Sets step count to 0 |
Running the BDD Tests
This project is tested using Behavior-Driven Development. The tests are written in plain English using a language called Gherkin, and they drive a real browser using Playwright. This section explains how to run them and what you're looking at when you do.
Starting the Test Server
The tests expect the app to be running on port 5174. Start it with:
npx vite --port 5174Leave that running in one terminal.
Running the Tests
In another terminal, run:
npm run bdd
This launches Cucumber.js, which reads the feature files in features/, matches each line to a step definition in tests/steps/, and executes them against a headless Chromium browser.
If everything passes, you'll see:
.........................
23 scenarios (23 passed)
109 steps (109 passed)
Each dot represents a passing step. If something fails, you'll see an F instead of a dot, and a full error message showing which scenario failed, which step failed, and what went wrong.
Understanding the Feature Files
The feature files are the heart of BDD. Open any file in features/ and you'll see scenarios like this:
Feature: Donut Shop
  As a hungry user
  I want to buy and eat donuts
  So that I can manage my donut inventory

  Scenario: Cannot buy more than 5 donuts
    Given I open the app
    When I click buy donut
    And I click buy donut
    And I click buy donut
    And I click buy donut
    And I click buy donut
    Then I should have 5 donuts
    When I click buy donut
    Then I should see the donut error "Can't carry more than 5 donuts"
    And I should have 5 donuts
This reads like a script for a person manually testing the app: open it, click buy five times, check you have 5, click buy again, check for the error, and confirm you still only have 5. Cucumber automates exactly that sequence.
The Five Feature Files
| File | What It Tests |
|---|---|
counter.feature | Step counting: increment, decrement, and reset |
donuts.feature | Donut shop: buying, eating, inventory limits, and error messages |
health-monitor.feature | Health display, decay over time, max health, and game over |
name-validation.feature | Name editor: opening the modal, validation errors, and saving |
integration.feature | Cross-feature: steps affect health, donuts restore health, etc. |
23 Scenarios, 109 Steps
The full test suite runs 23 scenarios containing a total of 109 individual steps. Each scenario starts with a fresh browser session (thanks to the Before/After hooks), so they're completely independent -- no scenario depends on state from a previous one.